
Homemade Pie Crust
Homemade pie crust can be one of the more challenging parts of baking. But thankfully, Gretchen P. has shared the classic pie crust recipe her mother used to make, from the Better Homes & Gardens cookbook. With the handy tips and tricks in her presentation, you'll have a delicious pie crust ready in no time!
You can also watch the full video presentation on the Evergreen YouTube channel here: https://youtu.be/e-aZA_TfoQg
Ingredients:
SINGLE CRUST
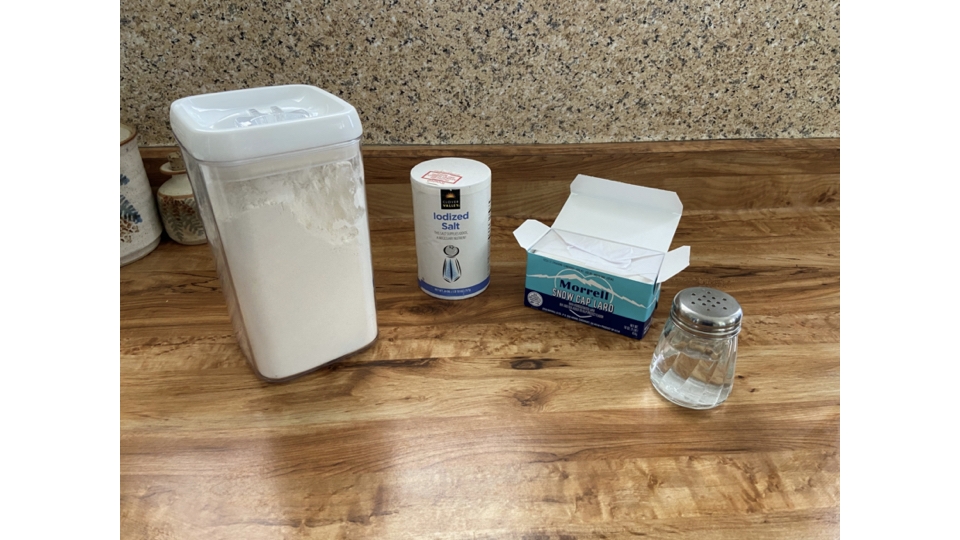
1 1/2 cups sifted all-purpose flour
1/2 tsp salt
1/2 cup shortening (or lard)
4-5 tbsp cold water
DOUBLE CRUST OR LATTICE TOP
2 cups sifted all-purpose flour
1 tsp salt
2/3 cup shortening (or lard)
5-7 tbsp cold water
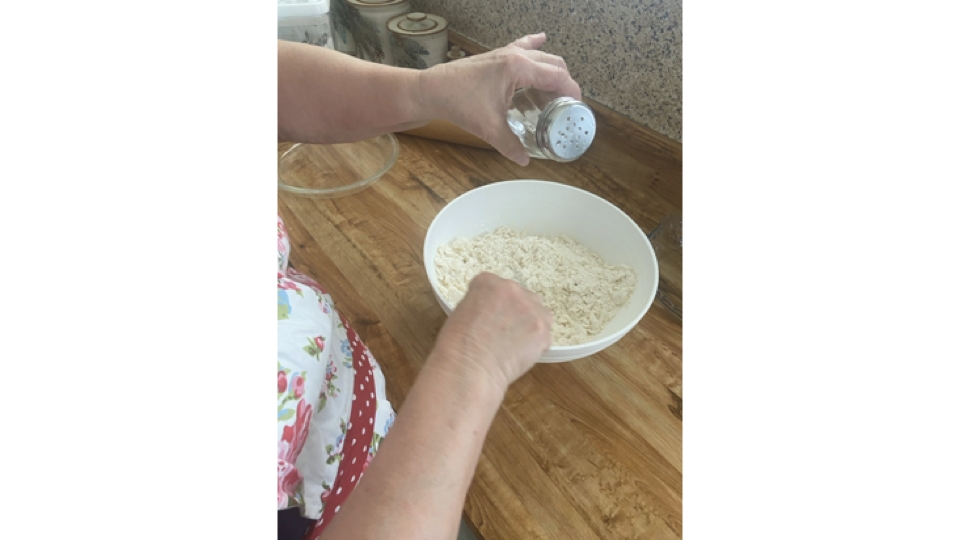
*Tip: putting your water in a salt shaker allows you to sprinkle it more evenly into your pie dough!
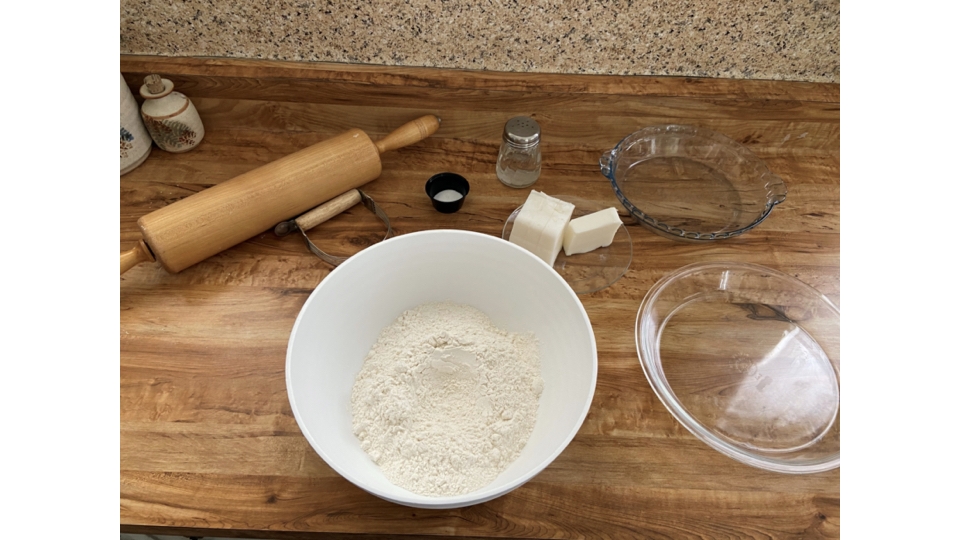
Double Crust - Step 1
Measure out your ingredients and get your pie dishes ready. If you are pre-baking a crust to fill later (think banana cream or chocolate pudding pie), flat-edged dishes work best, since you can decorate them. For double-crust or fruit-filled pies, you can use a fluted pie dish.
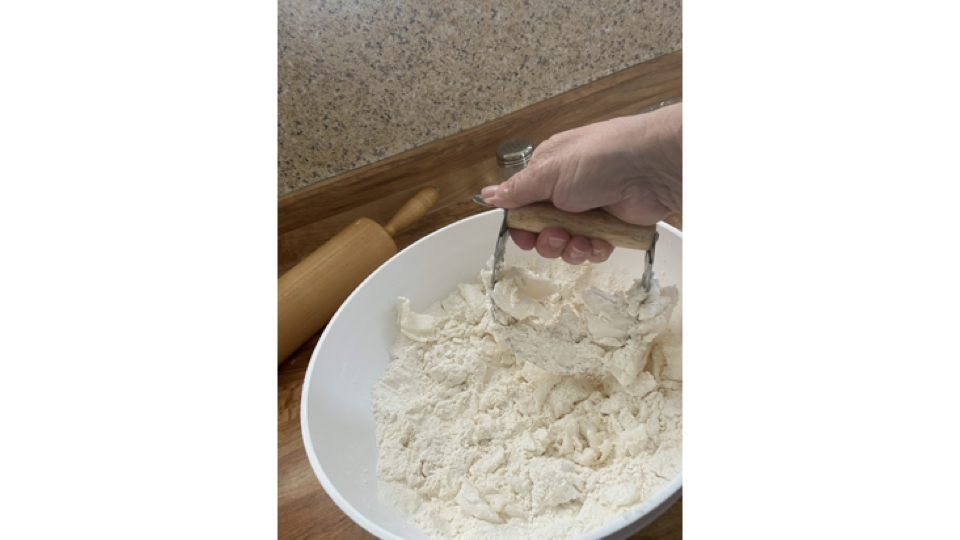
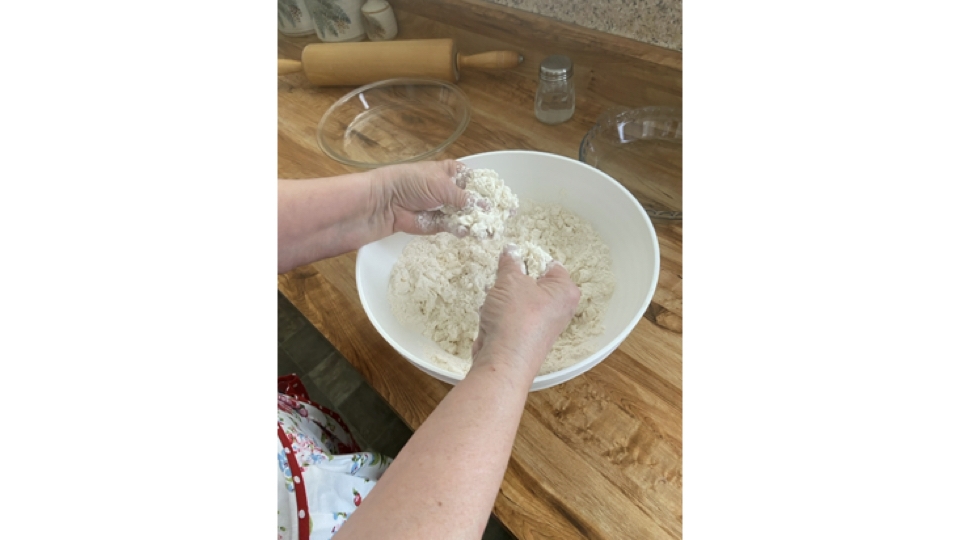
Double Crust - Step 2
Work the shortening or lard into the flour using a pastry cutter. After using the cutter, you can use your hands to get the shortening mixed in more finely and uniformly.

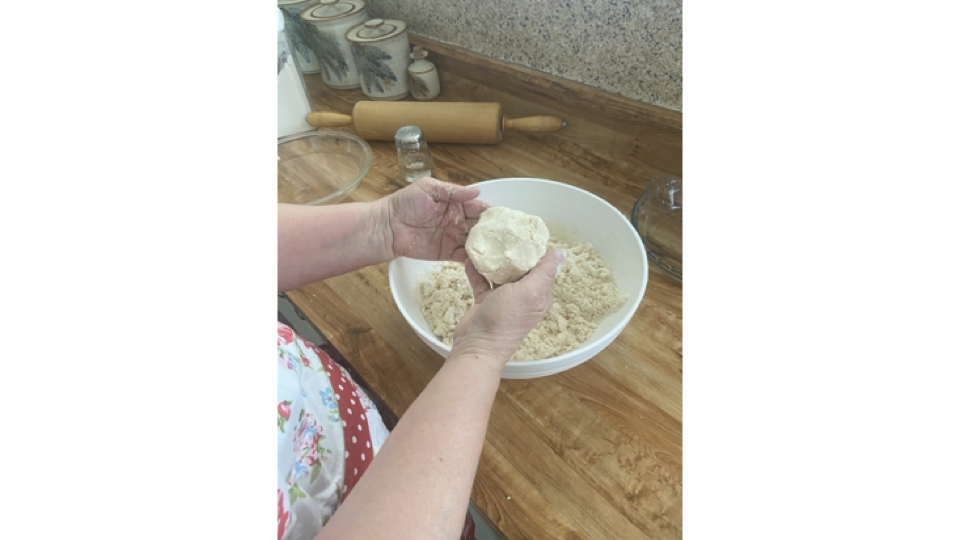
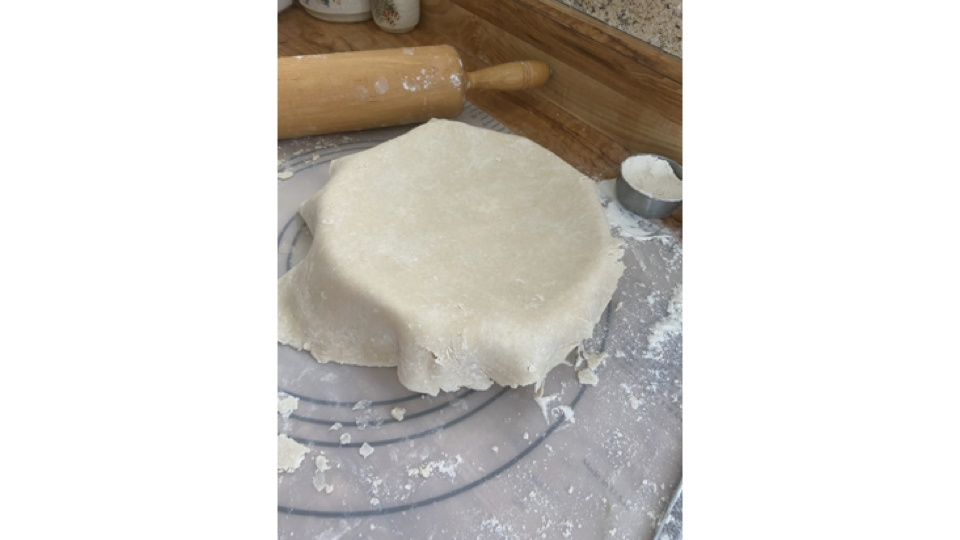
Double Crust - Step 3
Shake your cold water in the dough mixture, gradually adding more until the dough reaches a consistency where you can form a ball. The trick is not to use too much water, so that your crust will be nice and flaky.
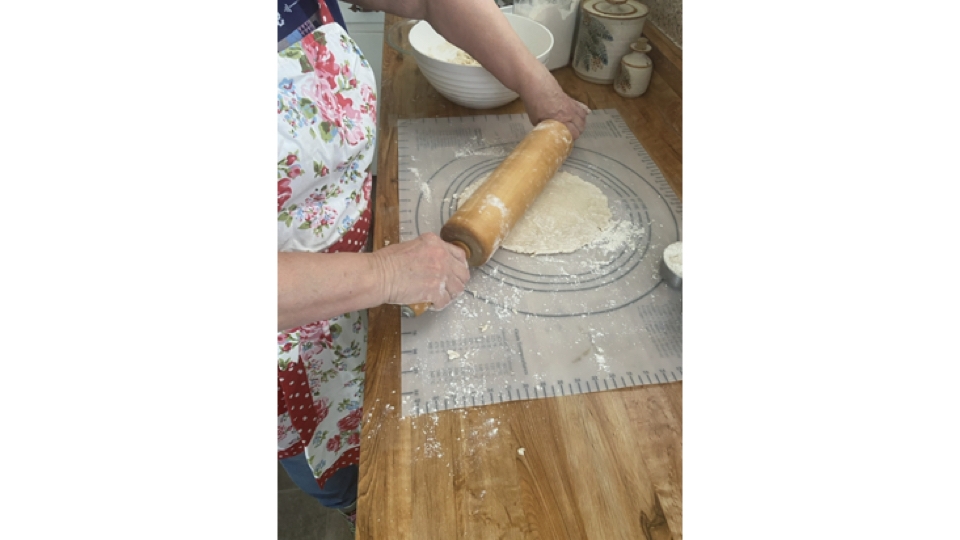
Double Crust - Step 4
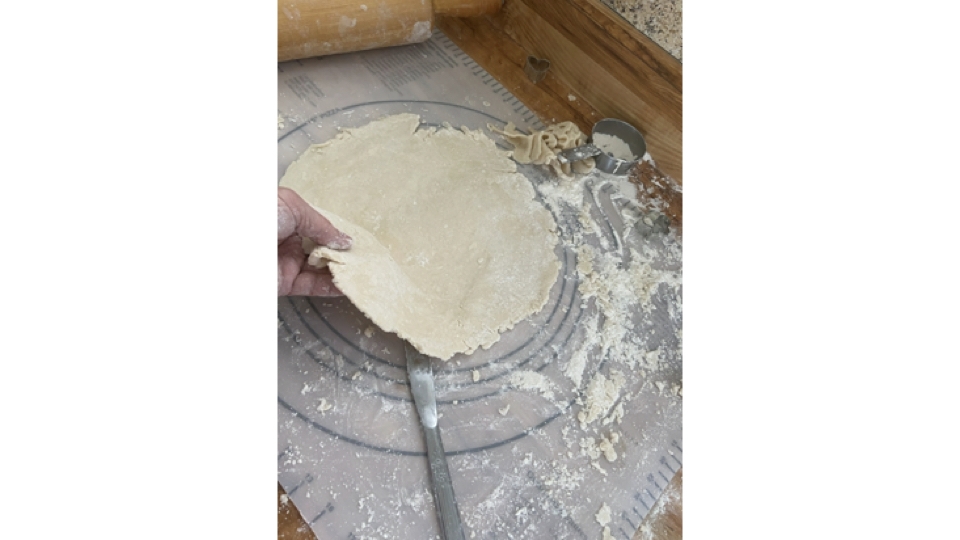
Roll out your dough into two flat circles, working with your hands as needed to keep the dough in one piece. Because this crust uses minimal water, the dough has a tendency to fall apart when rolling it out.
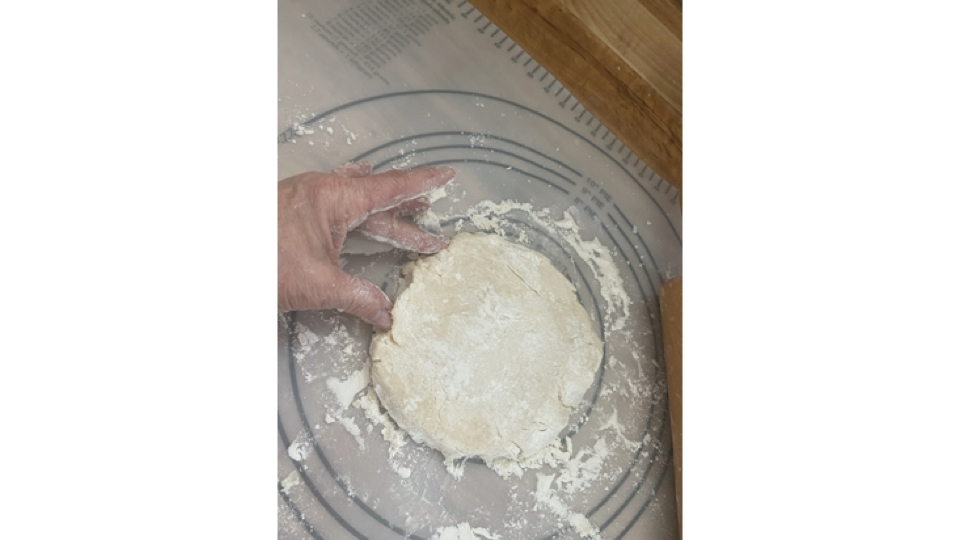
Remember to flip the dough several times as you roll. Flouring the rolling pin can help!
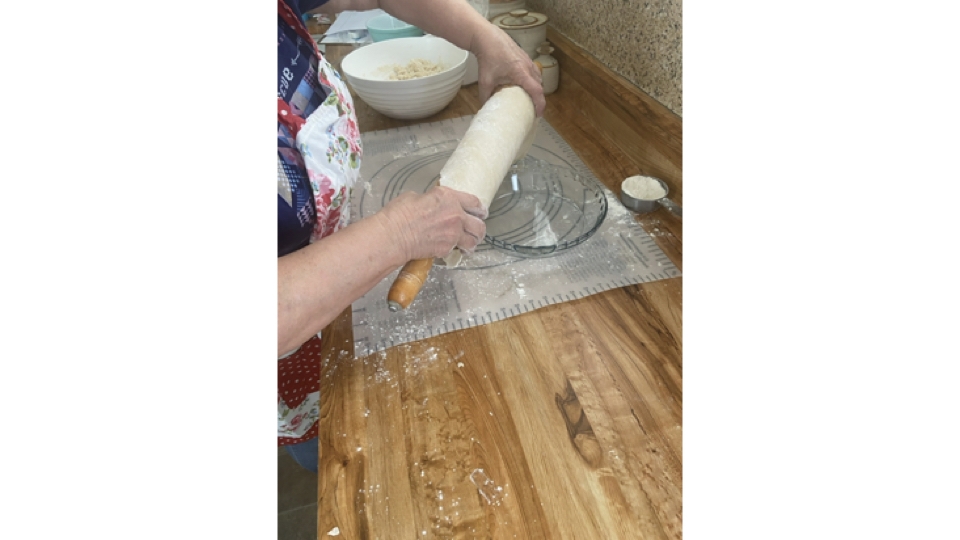
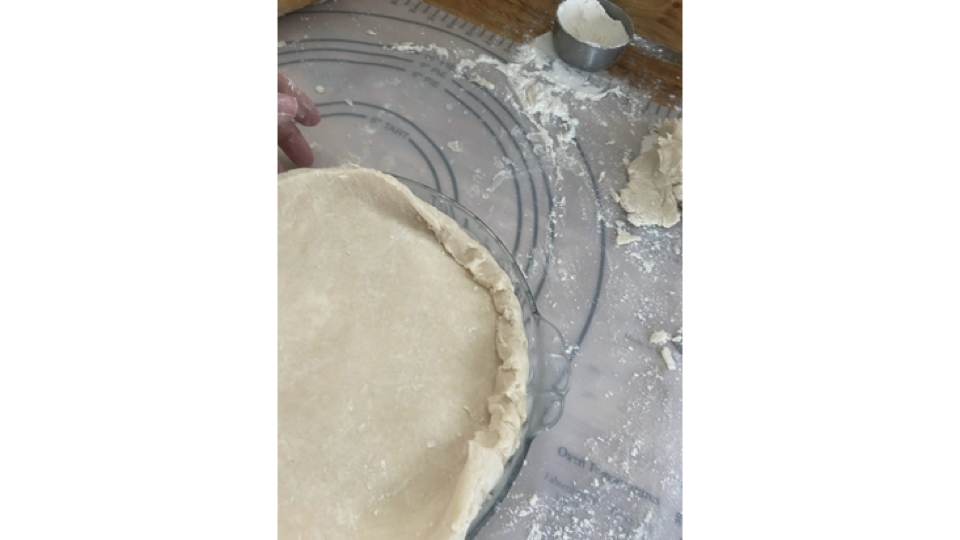
Step 5
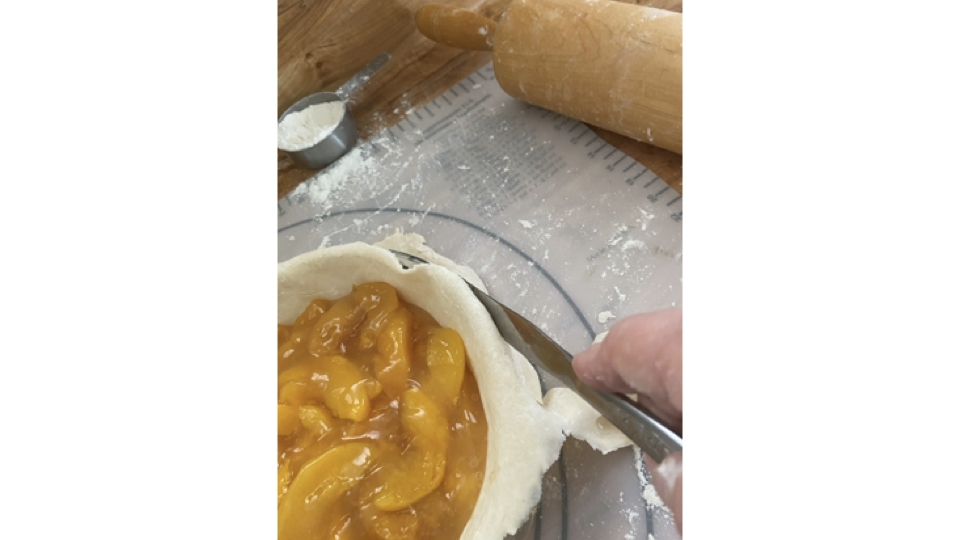
Gently roll one dough circle onto your rolling pin, and roll it out into the pie dish. This method helps keep the dough in one piece.
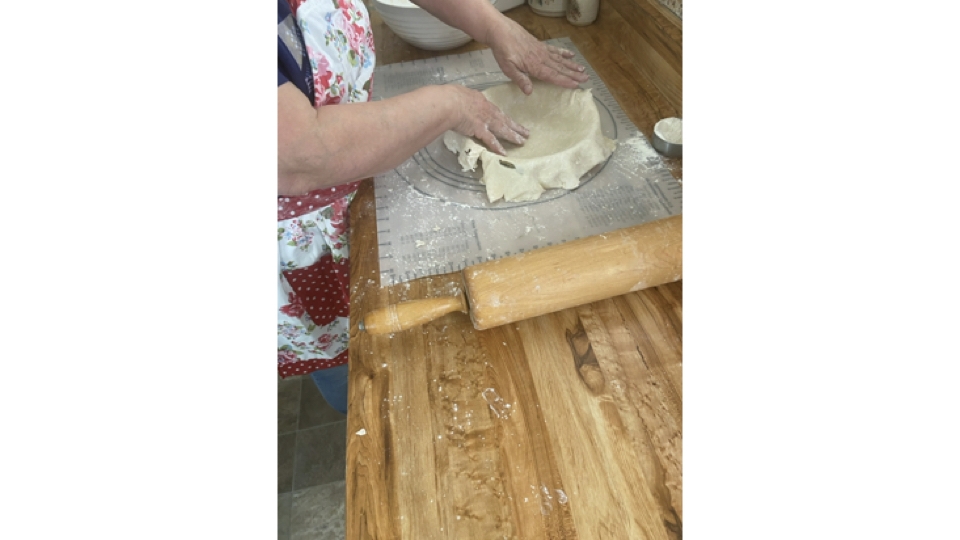
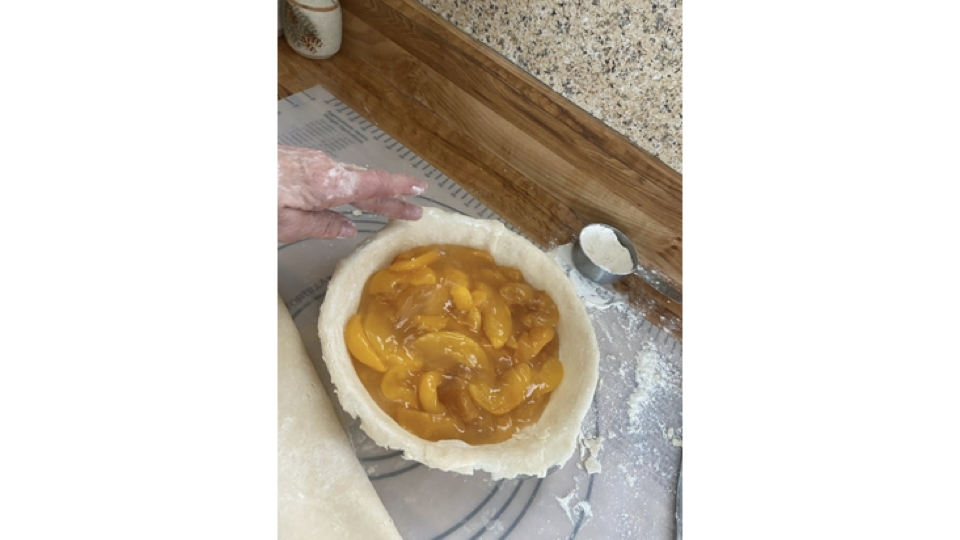
Trim the excess edges with a knife - Gretchen recommends adding your filling before trimming, since the weight of the filling will cause the edges to shrink a bit.
Double Crust - Step 6
Take a small amount of milk and rub it onto the edges of the pie crust. Then, take your second dough circle and lay it over the top of the filled pie. Trim the excess edges.
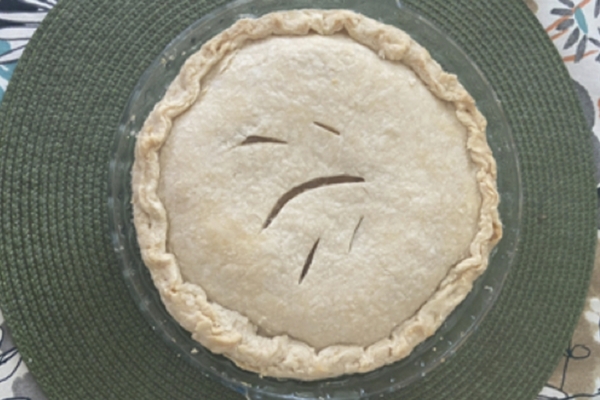
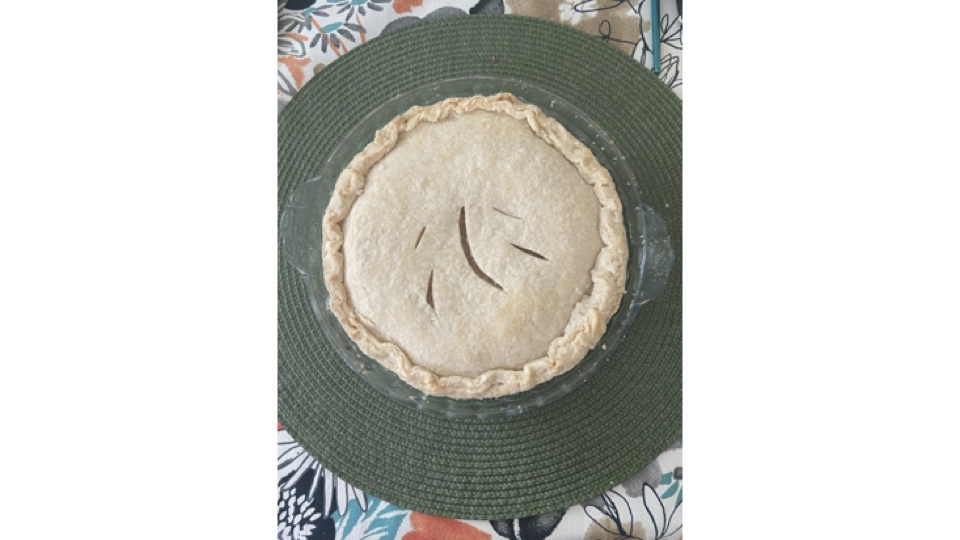
Making sure that the edges of both crusts are sealed together, fold them inward and crimp. Make some slits in the top of the crust to help ventilate the pie as it bakes.
Single Crust - Step 1
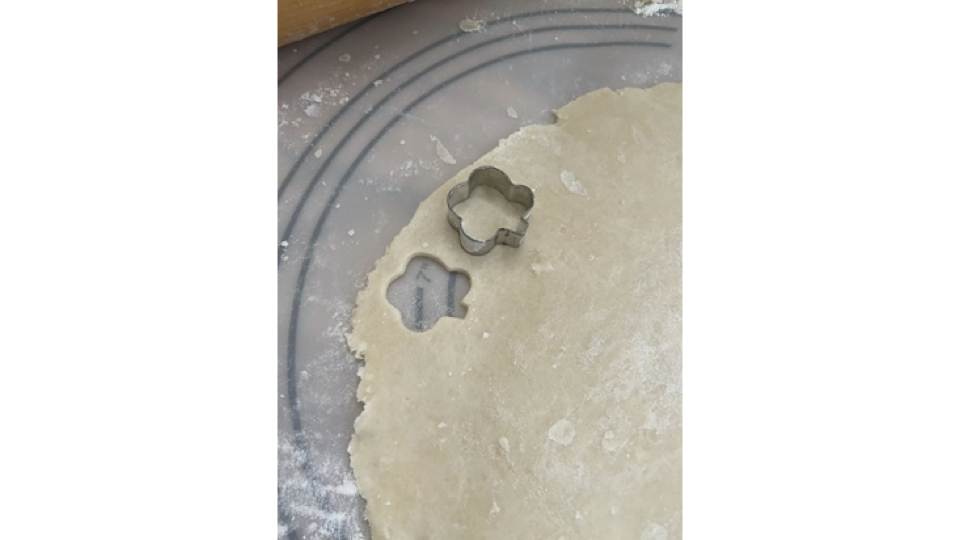
Roll out another circle of dough, making sure your surface is floured enough so the dough doesn't stick. Use some extra dough and cookie cutters to cut small decorations for the edge of the crust.
Single Crust - Step 2
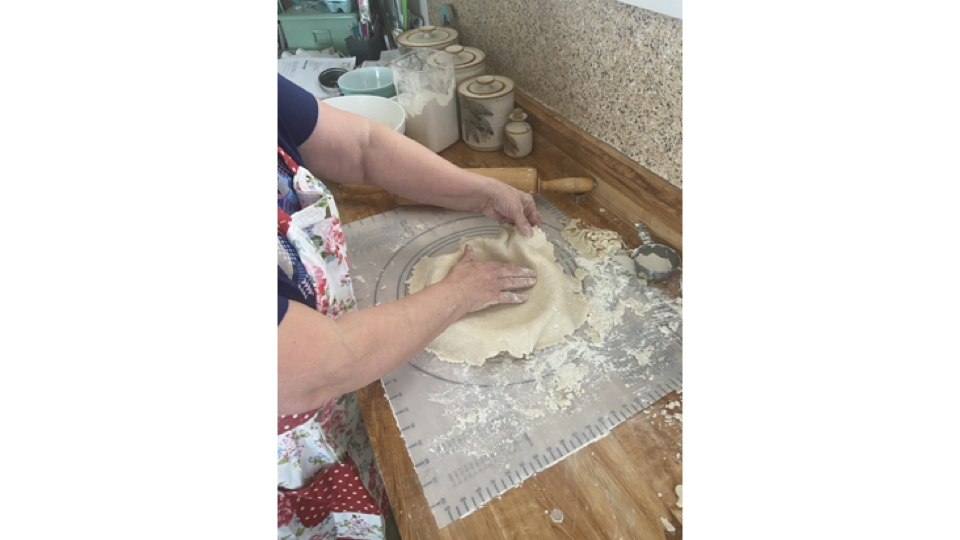
Gently lay the crust into a pie dish, being sure not to over-stretch the dough. Easy does it!
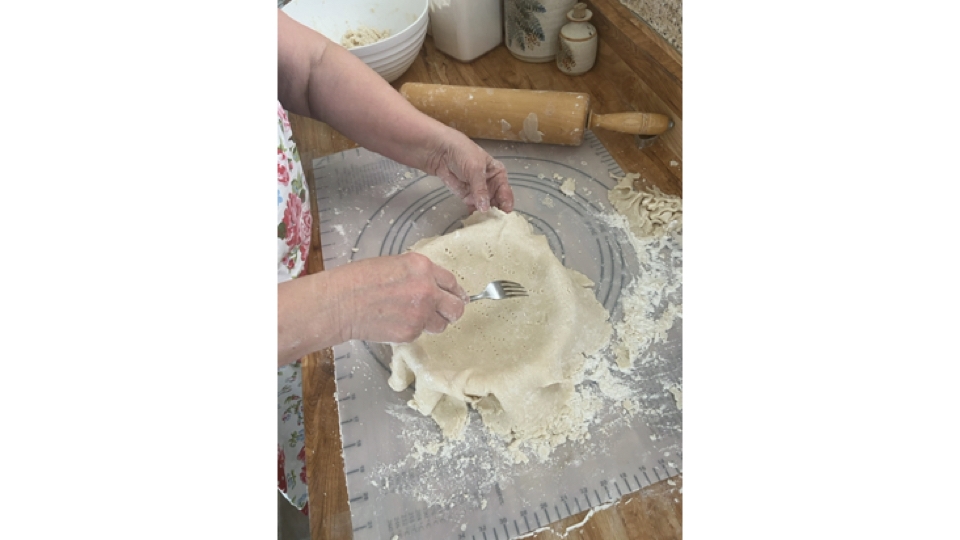
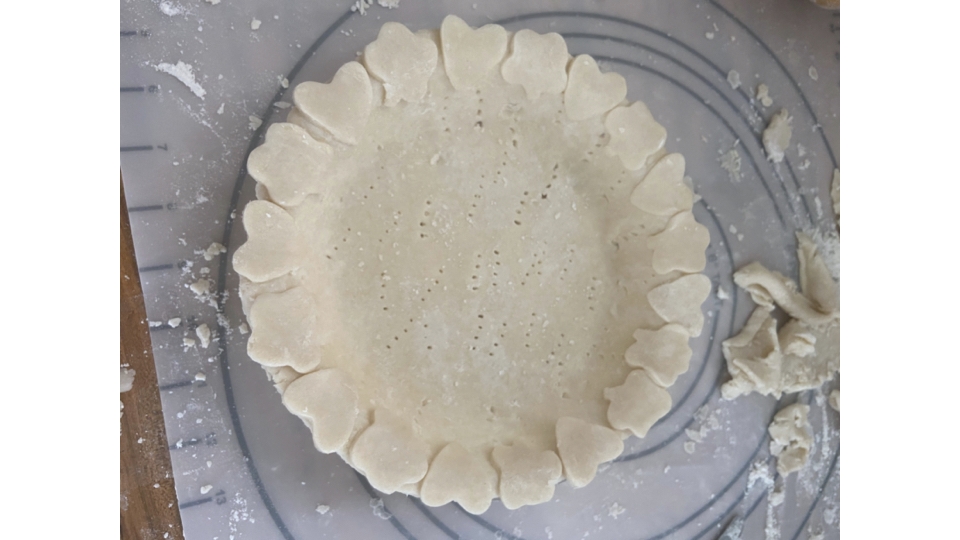
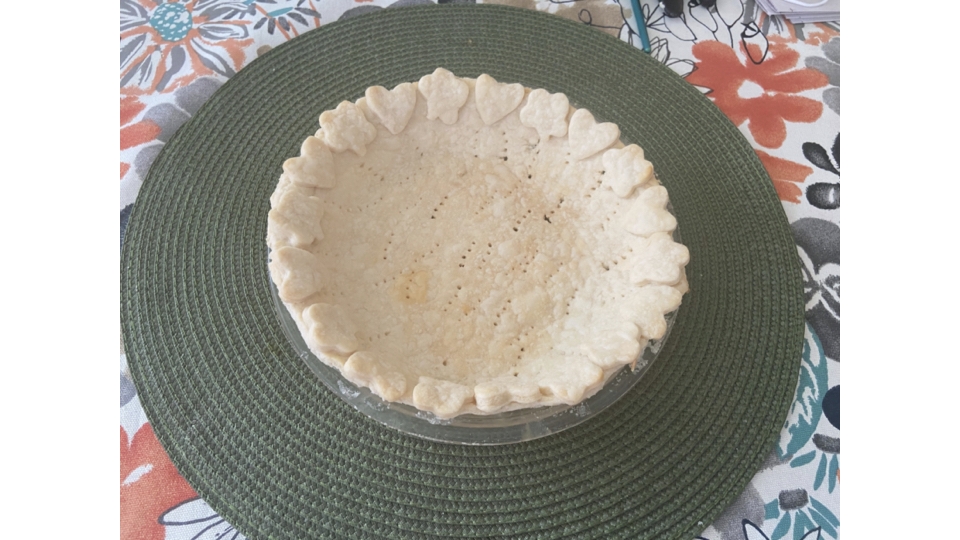
Use a fork to prick the crust all over - this helps keep the crust from shrinking too much when baking.
Single Crust - Step 3
Rub a small amount of milk onto the edges of the crust, then add your decorative dough cut-outs. They can be whatever shapes you want!
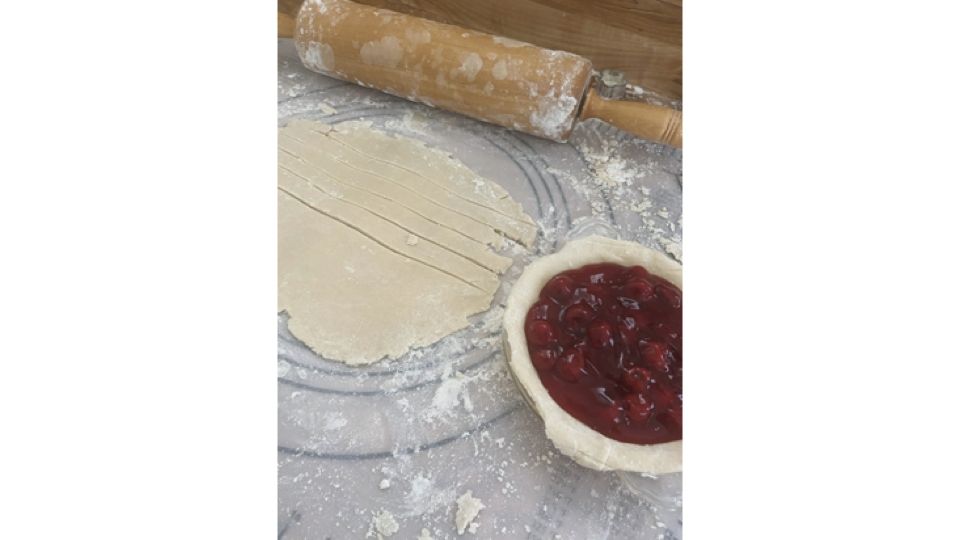
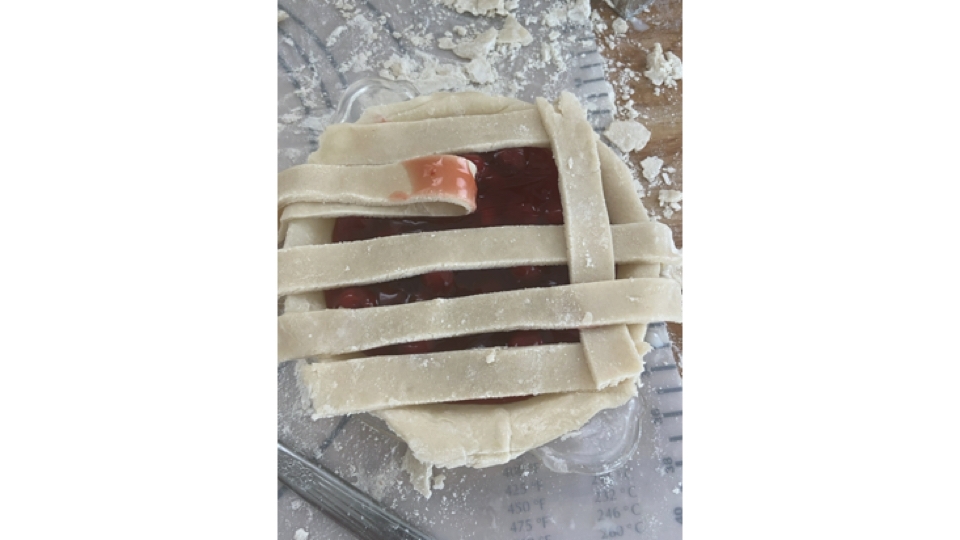
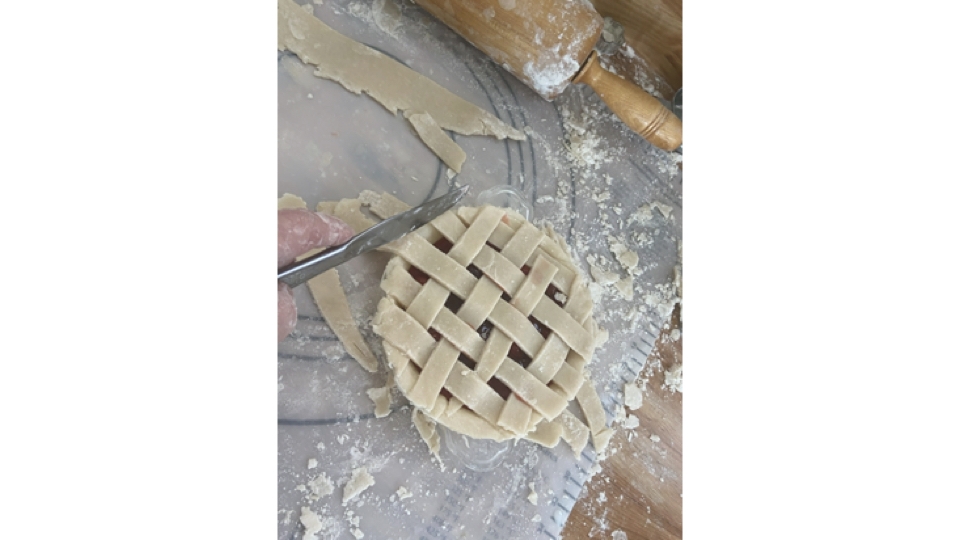
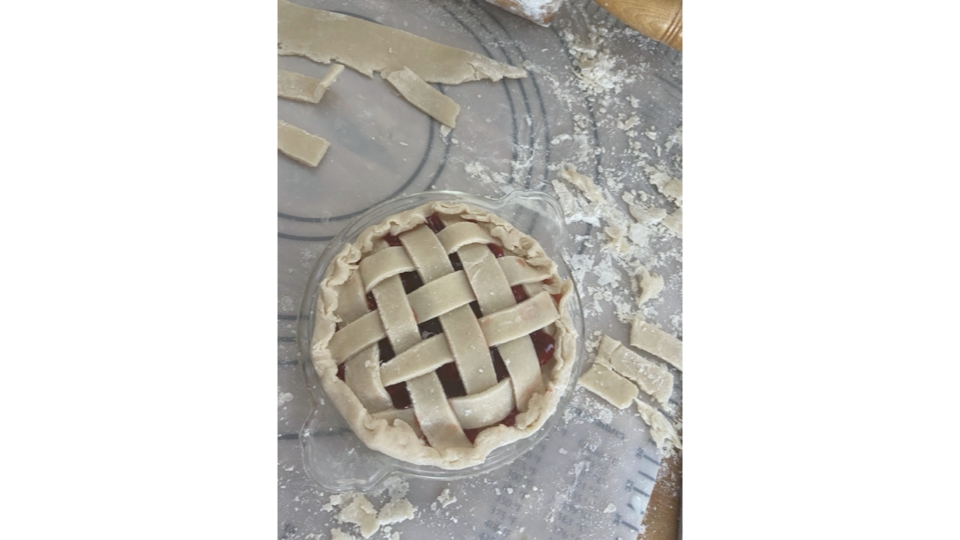
Tip: if you have some extra dough, why not make another pie? Gretchen used her extra dough to make a cherry pie with a beautiful lattice crust.
Baking
Bake your fruit pie and your crust in the oven - baking times will vary depending on the pie. For your single crust, wait for it to cool before filling.
Enjoy your scrumptious single and double-crust pies! Thank you Gretchen for sharing with us.
Join us every Sunday for more fun recipes, activities, travel trips, and good times. We have a VTE every Sunday evening at 7:00 EDT.
Cheers!